
Moving into a new place is such an exciting time as the layout is a clean slate and the decorating possibilities are endless! Though when renting it can definitely feel a bit constraining as rules and regulations as to what kind of house projects are allowed are quite limiting and can feel like a bit of a buzz kill.
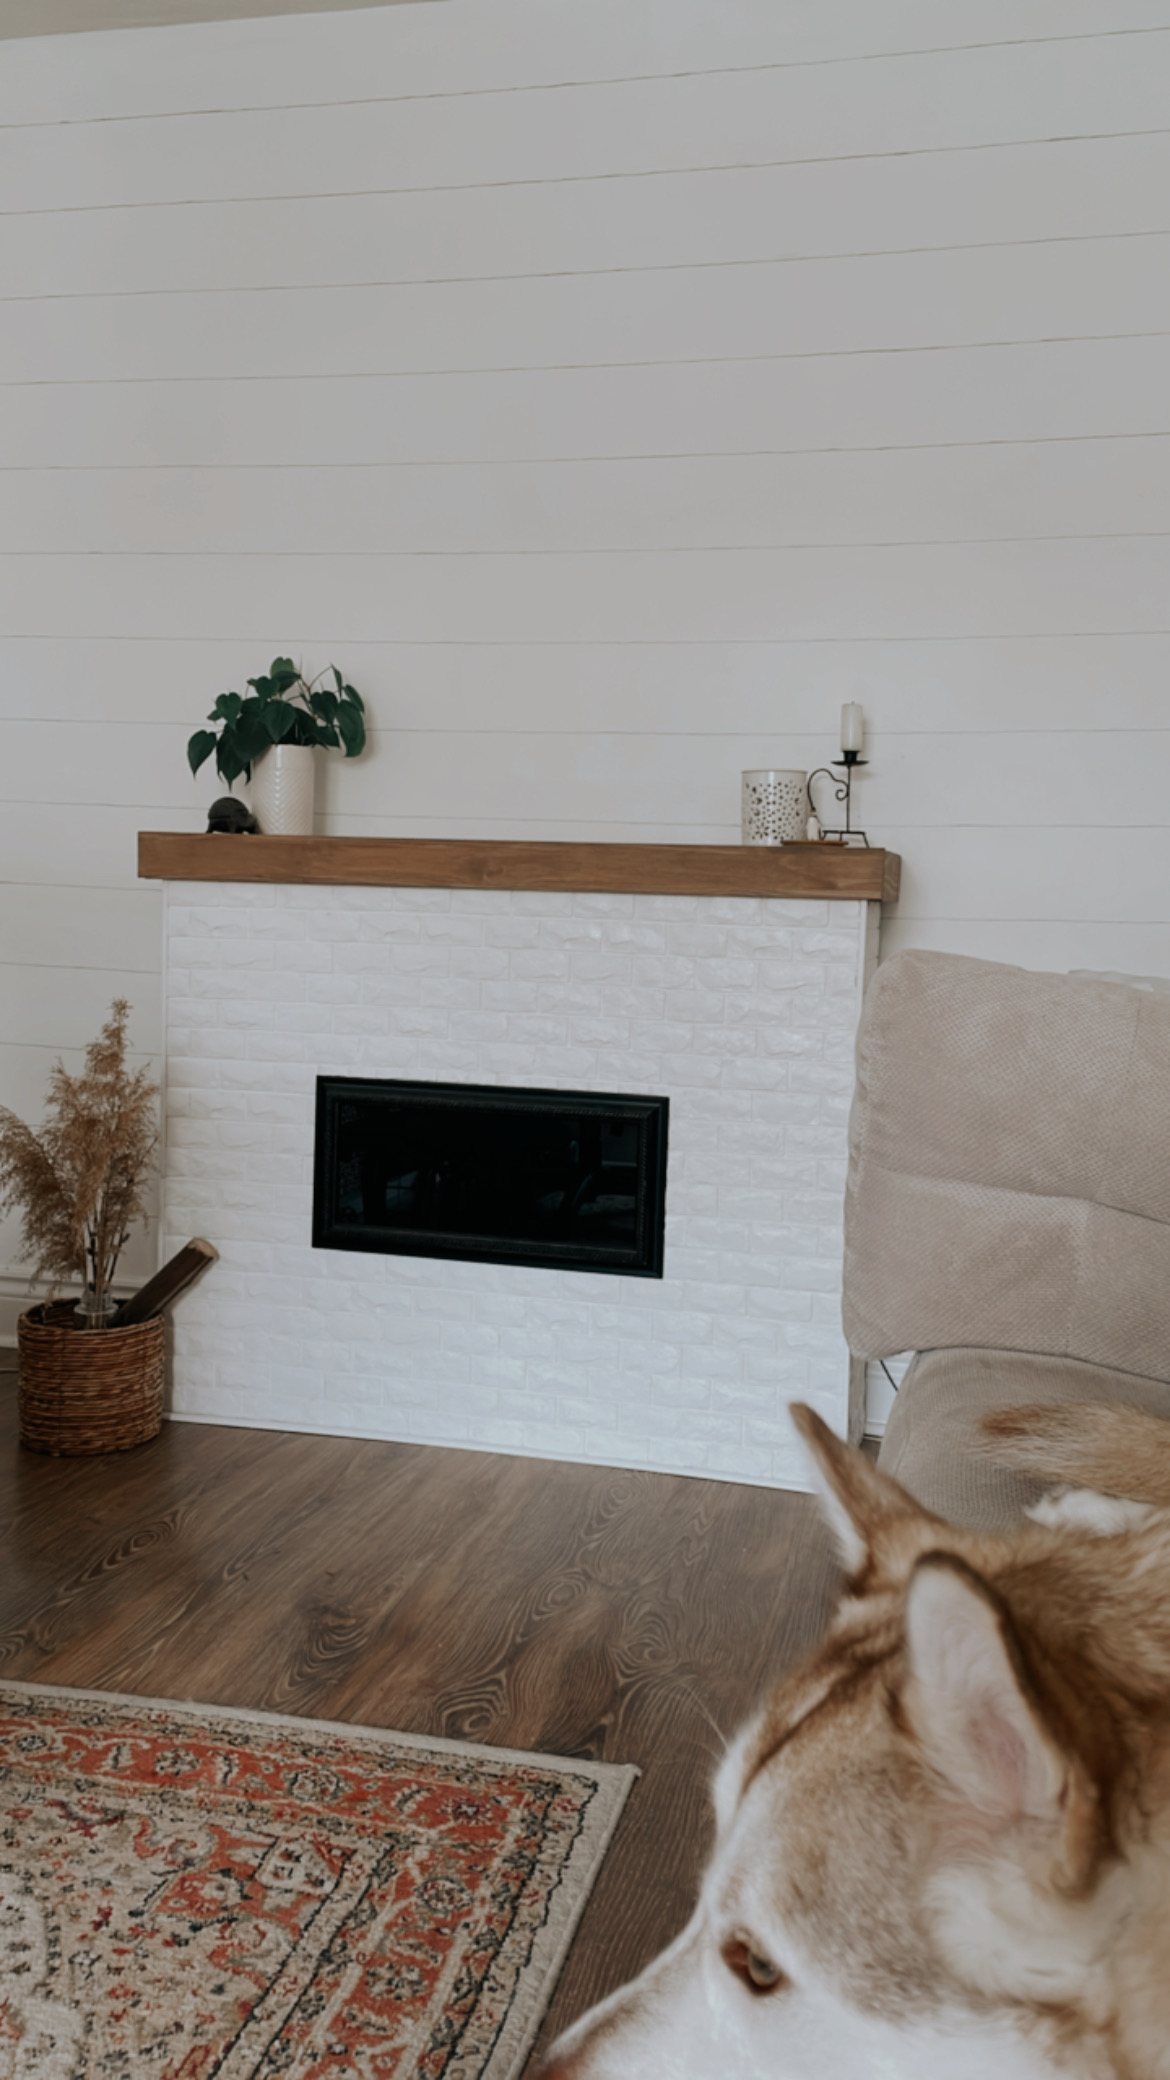
When I first moved into this townhouse I knew I wanted to create some sort of an accent wall with a fireplace. A wall that was simply there to make my heart happy : ) I love decorating for the different seasons and simply wanted one wall that I could go ham on and decorate with each new season. Only one problem… it had to be renter friendly. I had watched plenty of DIY fireplace builds that looked absolutely stunning, I especially loved the shiplap fireplaces, they just didn’t seem feasible to me as I didn’t want to spend a lot of money, nor did I think I was allowed to drill tons of screws into the wall.
That’s when a lightbulb went off in my head.
Previous to moving into this townhouse rental, my husband and I lived in my in-laws house for two years. There we had our own space in the basement and in it I created a little “pantry” and coffee station with this old bookcase that I thrifted from Value Village for 13 bucks! Instead of sending this bookshelf back to the thrift store I decided this would make the perfect bones for my DIY faux fireplace. Eek, the vision was there and my diy daydream fireplace plans were off to the races!
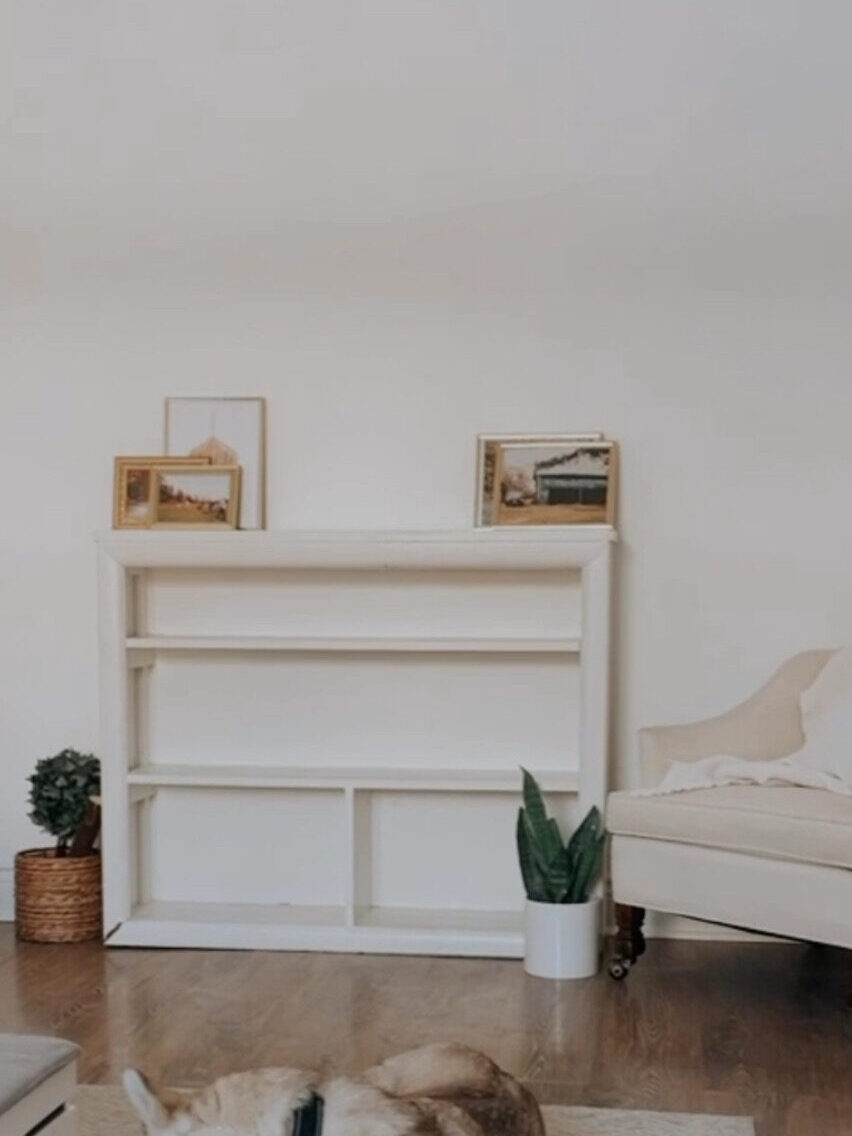
It took me awhile to actually think through how this would all come to be from a physical build standpoint as well as the design element desires I had in mind. I knew I wanted the fireplace to be white and I knew I wanted to incorporate shiplap as I just love the looks of it! Originally I thought I would purchase some shiplap and cover this bookcase with it leaving a cut out hole for the actual fireplace portion. After taking a trip to Home Depot I decided shiplap was a bit more money than I was comfortable spending and the thought of cutting a hole out of this bookshelf perfectly seemed daunting and perhaps a bit more than I was willing to handle. Anyways I didn’t even want an actual heater installed in it, I just wanted the fireplace for looks : )
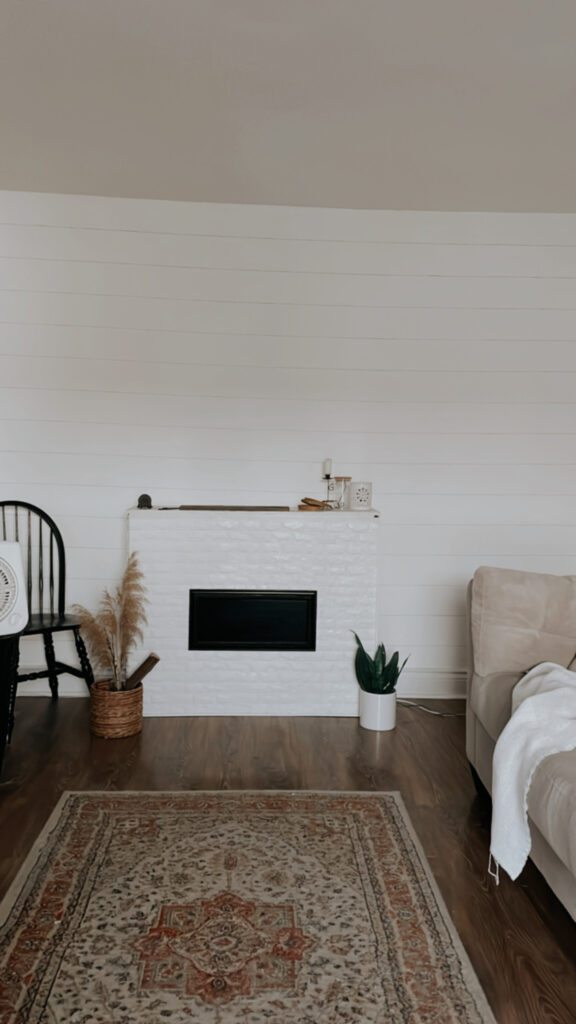
That’s when another light bulb went off in my head and I realized I was wayyy overcomplicating this project! All I needed to do was flip the bookshelf around, slap some peel and stick brick on there, thrift the perfect picture frame, place a mantle on top, and voila- the perfect budget friendly faux fireplace! & the best part?! Since it’s a bookshelf that has been turned around – there’s free storage in the back, something that’s hard to come by for us renters! It’s a win win in my books : )
Building a Renter Friendly Faux Fireplace Step-by-Step
For the actual “fireplace” portion I knew I wanted something long and narrow, black, and something that gave lots of glare to best replicate a real fireplace. I had previously hung some fun diy chalk marker picture frames on my walls by…
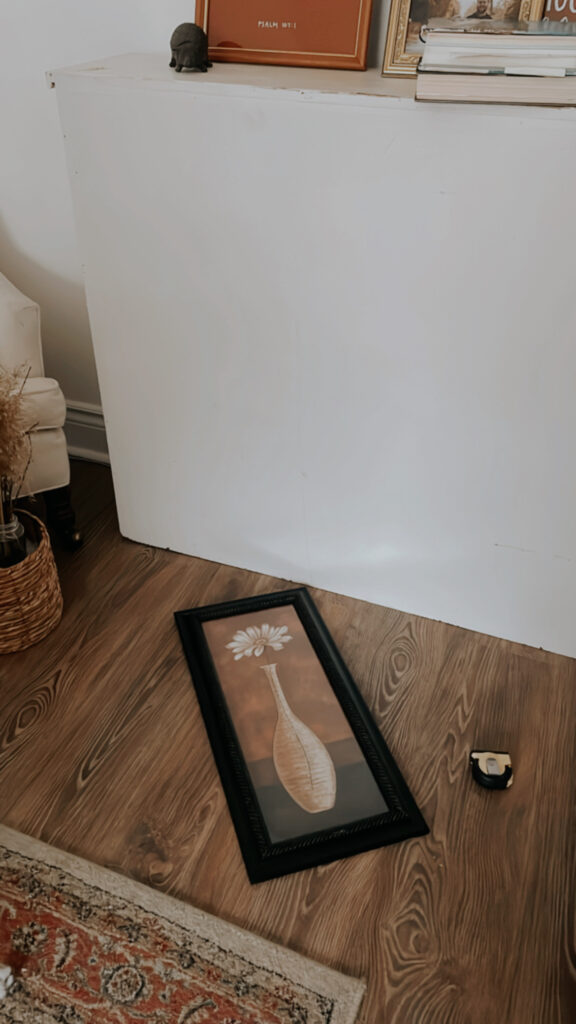
- Thrifting a picture frame
- Removing the picture
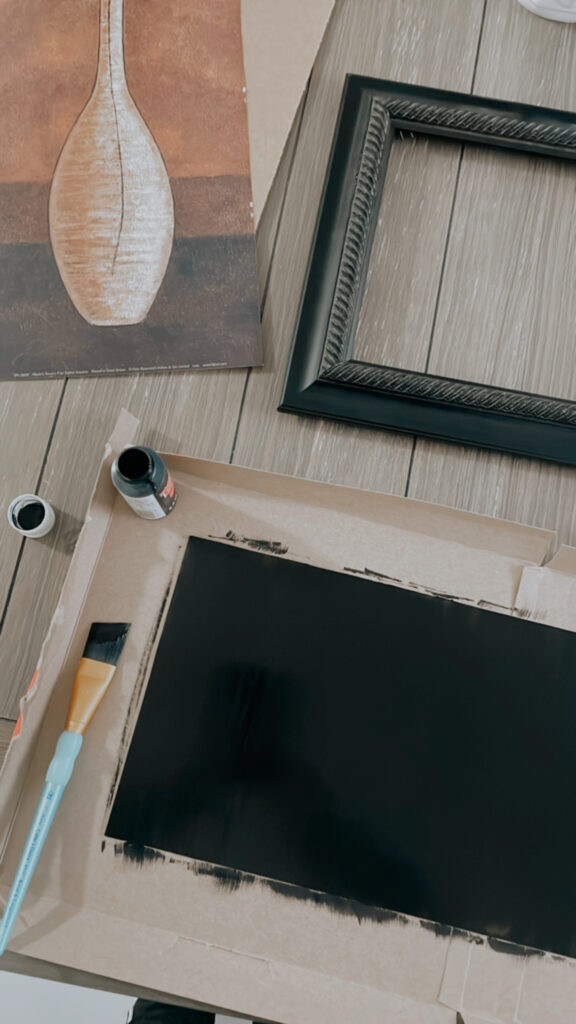
- & Painting the inside of the glass with acrylic paint
(From there the idea was to use a white chalk marker and draw on the outside of the frame to create a cute custom design or sign that is 100% changeable by just removing the chalk marker with a wet paper towel and drawing again.) I decided this would give that perfect fireplace look by painting the inside of a long narrow frame black! (The only difference of these projects is just that I’m not using any chalk marker to draw on my fireplace window.)
Once my picture frame window pane was all dry I reassembled the picture frame and lined it up in the center of my bookcase. I took careful note of the corner measurements so I could drill in some screws to simply hang the picture frame on.
Once that had all been mapped out I simply stuck on some peel and stick bricks I found on Amazon. Originally I was hoping to shiplap the fireplace some way, but I didn’t want to buy expensive shiplap, and the shiplap contact paper just didn’t look realistic enough for me so I decided on the next best- faux brick!
These are the specific ones I used : peel an stick bricks – I purchased a set of 20 back in 2023 for $45 CAD
These bricks are definitely smaller than real bricks so it makes them look a tad more fake in my opinion, but they are also 3D which at the same time makes them look a bit more real as compared to something like 2D contact paper. They came with a lot of glare so I actually added a layer of my white wall paint to ensure they matched my wall and to help tone down the glare a bit.
If you do end up using these same bricks, just a word of caution, they are super sticky! I accidentally stuck one on my bookshelf a bit crooked and pulled it off to replace it and it definitely ripped paint off the bookshelf. I would only use these on something you don’t care about.
Remember how I mentioned I really wanted to incorporate shiplap into my fireplace? While I didn’t end up coming up with a shiplap fireplace I did still end up incorporating it into my wall in a huge way by shiplapping the entire wall!… But not with real shiplap of course since I’m a renter. I got this lovely shiplap look for FREE just by using a level and a pencil! If you want to read more in detail about how I did that check out this blog post.
To clean up the edges of my diy fireplace I grabbed three little pieces of molding from Home Depot, cut them down to size, painted them white, and hot glued them on.
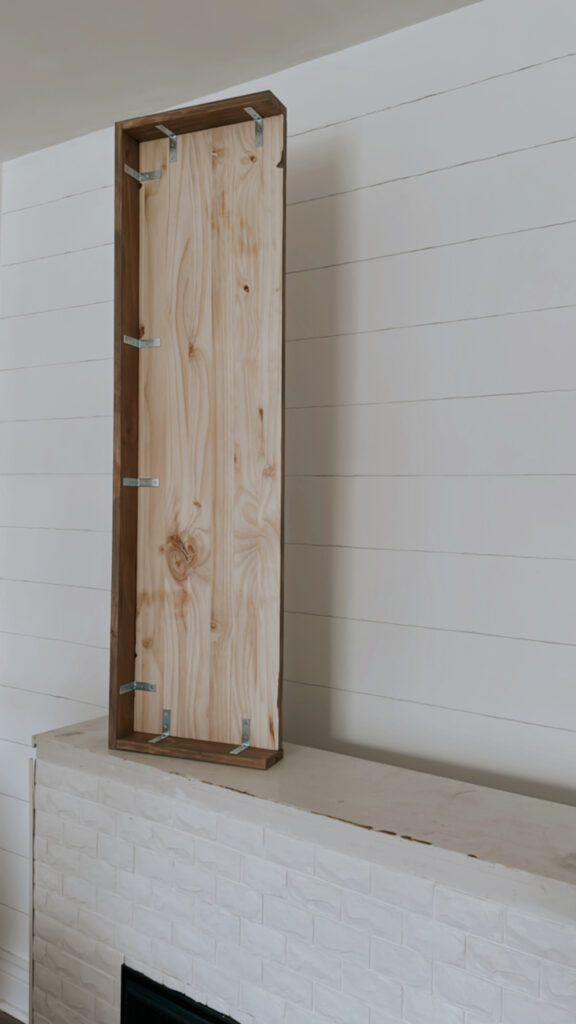
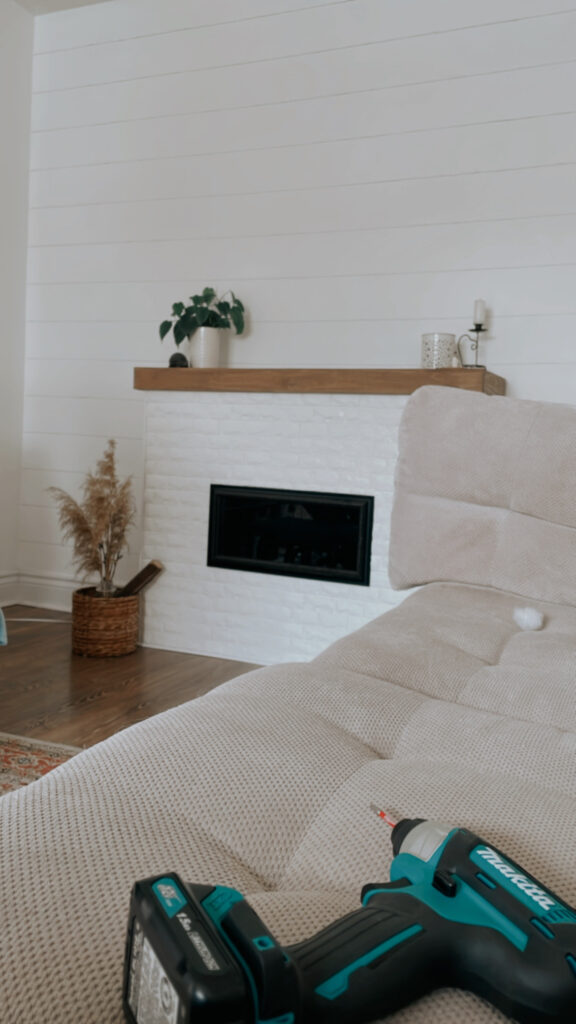
All that was left to do at this point was configure a mantle. For this I purchased a piece of wood and some brackets. Before piecing this together I stained the wood using some stain that I had on hand that matched my wood floors nicely. Once this was assembled I simply set it on top of the bookcase to complete my project.
I absolutely love how it turned out! 😍

& now for the best part… decorating the fireplace for all the different seasons!

I went for a minimal look on top of the faux fireplace and used some of the leftover wood from the fireplace mantle to create a large frame to hang above it. I am no woodworking pro, just a diyer with a vision, so I just ended up nailing the frame together, totally unprofessional, but it got the job done! For the artwork behind it, I found a digital download print off of etsy and simply sticky tacked it to the wall and hung the frame over it.
I love how this project turned out! It adds so much more interest and character to this room while fulfilling my desire to decorate for the seasons! Ultimately this little wall in my townhouse makes my home so much more cozier and my heart so much happier : )
Can’t wait to keep making our rental cozier one little DIY project at a time! Thanks for stoping by!